Phoenicians are celebrating our exodus from 3-digit temperatures - Fall has arrived! Kids born and raised in the desert are even breaking out their sweatshirts for the "chilly" 70-degree mornings.
While I may not be ready for boots and sweaters, the cooler temps do give me a great excuse to try out some new soup recipes. We recently had a large amount of potatoes and broccoli to get through, so I jumped on the trusty www.allrecipes.com and used my favorite "Ingredient Search."
I changed the servings on the site (another handy tool!) in an attempt to make half of the original recipe. However, I forgot that the numbers don't change in the actual step-by-step instructions. So, in a last-ditch effort I threw in more potatoes (4 total), onion (1 whole), but only had 20 oz. (2 frozen bags) of broccoli florets. I used the original recipe's amounts for the broth and seasonings, and added a dash of Cayenne per one of the comments. The result was excellent! I think my "mistake" of using slightly less broccoli helped to avoid the overwhelming broccoli flavor that a few comments mentioned.
I did end up with quite a bit left over, so I'm hoping it's great for leftovers, too! All in all, it's an easy recipe for a tasty, filling dish.
*BONUS! Did I mention it's vegan?! Don't tell your guests... They won't even miss the heavy cream or butter. :-)
Click here for the full recipe!
Monday, October 27, 2014
Sunday, October 26, 2014
Homemade Fruit Leather
Local summer produce yielded several kinds of fruit, and we took full advantage of the offerings through Bountiful Baskets. We soon found our kitchen full with: 12 pints of blueberries, 18 lbs. of cherries, and 21 lbs. of apricots!

Introducing... homemade fruit leather (or "fake fruit roll-ups" if you're Alison's kids)! I've found several different recipes for drying fruit into strips for longer-lasting healthy snacks, and they all vary in procedure and cooking/drying time. So, I experimented with every method and can attest to this tried-and-true recipe. I prefer the raw flavors of the fruits mentioned above, so I did not add any honey or lemon juice, and they all came out great!
Homemade Fruit Leather
- 4 cups of fruit
- water
- 2 TBSP honey (optional)
- Lemon juice to taste (optional)
- Line a baking sheet with parchment paper or plastic wrap (It won't melt at your oven's lowest temperature).
- Set the oven to the lowest temperature (mine says "WM," others are around 150 degrees F - Do not exceed 150 if you're using plastic wrap!).
- Blend your desired fruit to a smooth liquid in a blender or food-processor.
*For less liquid-y fruits (like apricots), simmer them in a saucepan on low heat with just enough water to cover first. - If you like your fruit leather especially sweet, add honey. If you like tart fruit (or you're working with a very sweet fruit like grapes), add lemon juice.
- Poor the liquid fruit mixture onto the baking sheet. You want a thin, even layer. Spots that are too thin will dry early and become crispy. Spots that are too thick will take too long to dry and/or become sticky.
- Dry in the oven for 4-6 hours.
*The first time you work with a new kind of fruit, you will have to start checking after 4 hours. Drying time can vary based on your oven's lowest setting, the thickness of the fruit, and whether you added water or lemon juice. I found apricots to take the longest - over 8 hours! I recommend trying this first on a rainy day when you'll be at home. Then, it's great to put in overnight, and wake up to the sweet smell of dried fruit!
- Enjoy!
Saturday, October 25, 2014
For the Birds!
The Phoenix desert is known for a large variety of hummingbirds. While we have one or two that frequent a nearby tree, we wanted to bring them in a bit closer. To keep this new hobby frugal, we acquired a used hummingbird feeder, and researched a homemade hummingbird nectar recipe. It's too easy not to share!
Homemade Hummingbird Nectar
More than one site used a temperature chart to determine the frequency of replacing the nectar and cleaning the feeder in order to keep the birds healthy and prevent fermentation, mold, and/or attraction of insects:
Homemade Hummingbird Nectar
- Bring to a boil 4 parts water to 1 part sugar.
- Remove from heat and let cool, stirring until all sugar is dissolved. *It is important to maintain the 4:1 ratio for the health of the birds (and to avoid attracting other animals and insects).
- Pour the cooled nectar into your feeder!
More than one site used a temperature chart to determine the frequency of replacing the nectar and cleaning the feeder in order to keep the birds healthy and prevent fermentation, mold, and/or attraction of insects:
| High temperatures | Change nectar after | |
| 71-75 | 6 days | |
| 76-80 | 5 days | |
| 81-84 | 4 days | |
| 85-88 | 3 days | |
| 89-92 | 2 days | |
| 93+ | change daily |
| Chart Credit: http://www.wildbirdshop.com/Birding/humfeed.html |
Wednesday, July 30, 2014
Follow the Food
Before moving to the desert, we participated in a cross-country bicycle trip that put us up close and personal with some of our food sources. We saw the contrast between big farm corporations and smaller-scale farmers, and heard the stories of local and small town businesses and farmers being run out by larger corporations and chains. After our ride, we read Michael Pollan's book, Omnivore's Dilemma (discussed in a previous post), and started to become more intentional about sourcing our food.
We visited a few farms that were practicing small, local, sustainable agriculture. Polyface Farm in Swoope, Virginia (mentioned in Pollan's book) boasts a "beyond organic" label, where pigs till the forest, rabbits neutralize waste, and mobile chicken coops permit natural cycles of grass growth. Polyface Farm introduced techniques that have caught on with organic farmers, and we have been hot on the trail!
Despite the lack of water, the Phoenix valley sustains a year-long growing season, and we have been thrilled to find opportunities to support our local (and organic) farmers. Our first find was Bountiful Baskets, a volunteer cooperative that provides local produce and grains on a bi-weekly basis. This organization is run completely by volunteers, and has locations around the country. Their unique status ensures low costs for consumers and high returns for local farmers. We have loved contributing to Bountiful Baskets, and have learned a lot about food seasonality, recipes and cooking/preparation. Since you can never be 100% sure what will be in the next basket, we've discovered several new foods, too (Bok Choy, Fennel, Leeks, and more!), which always turns into a hunt for new recipes.
We'd love to read any comments about your local food options; please share below!
Check back for new recipes and ideas from our most recent basket bounty!
Monday, July 28, 2014
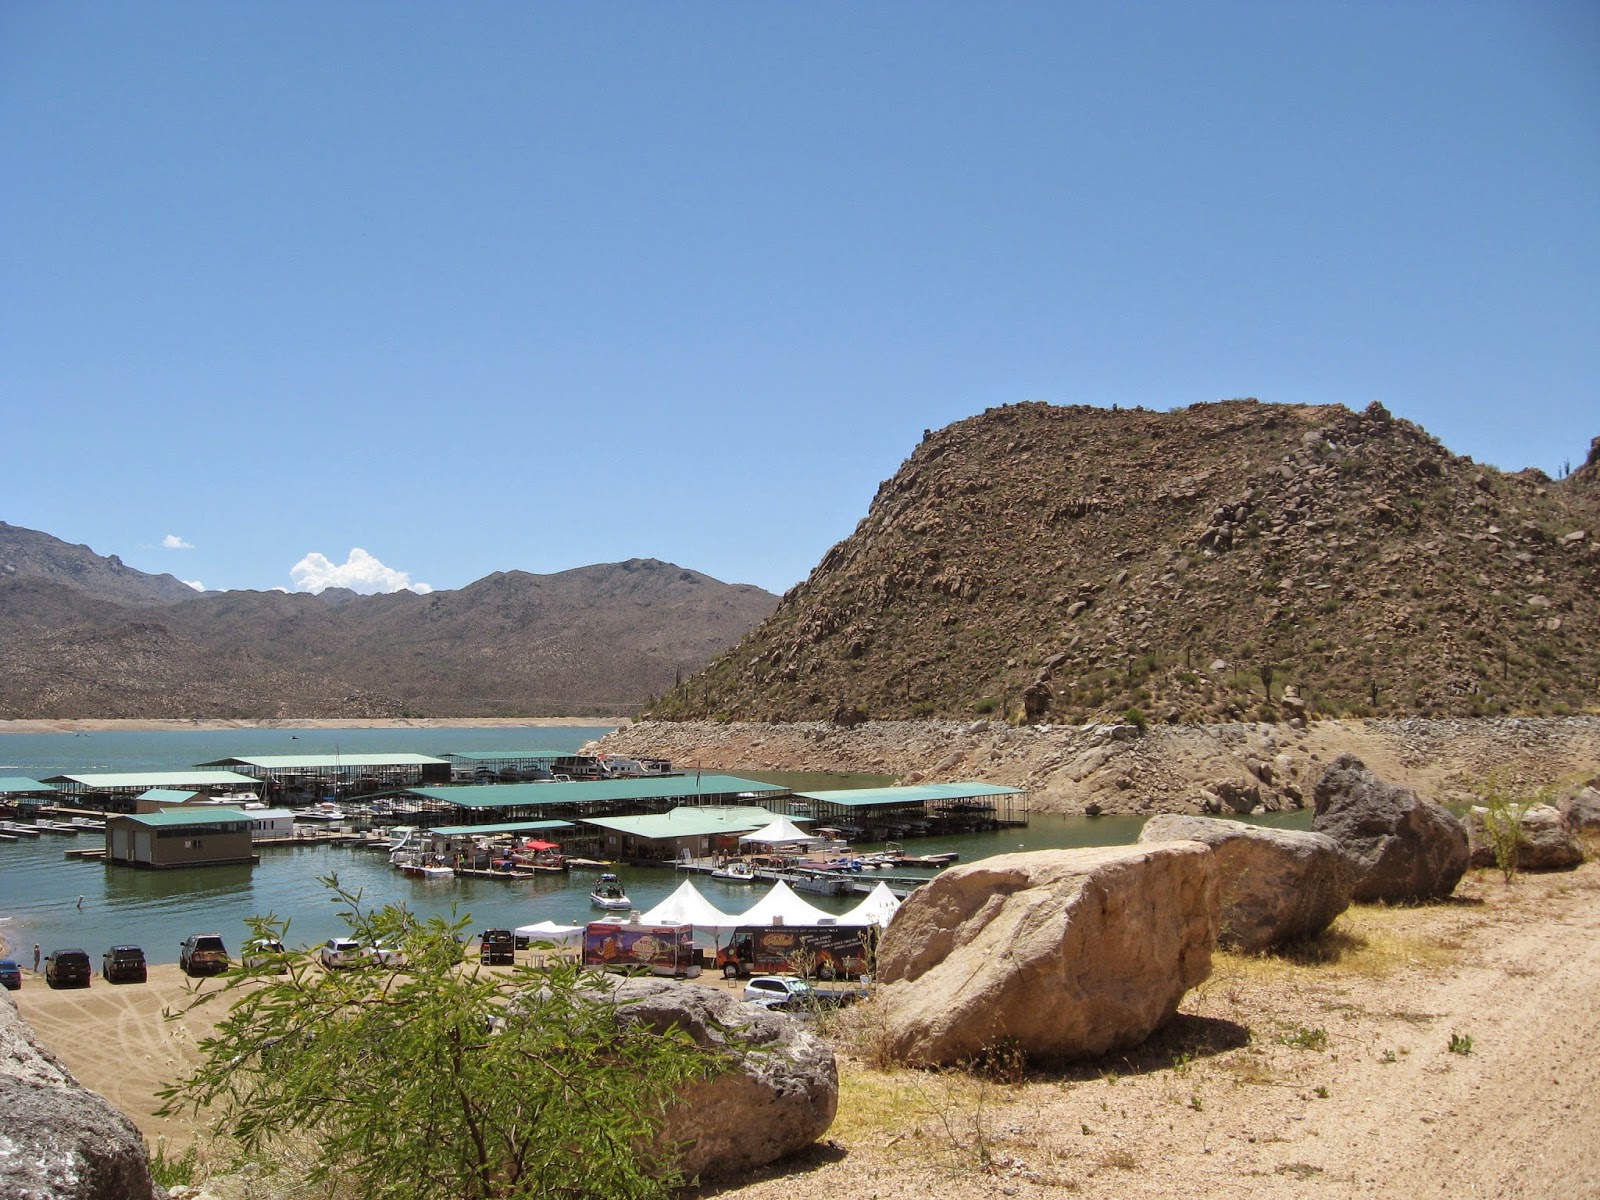
Around Town: Bartlett Lake
Before temperatures hit the triple digits, we wanted to explore some of the water recreation near the Phoenix area. Many newcomers to the desert are shocked to hear that there are multiple options for getting on a boat in the desert - Lake Pleasant, Lake Roosevelt, Canyon Lake, Saguaro Lake, Lake Bartlett - just to name a few. For this trip, we were looking for remote camping and Stand Up Paddle Boarding (SUP)... and you can't beat the price of National Forest camping (free)!
Despite some difficulty navigating the roads of Tonto National Forest, we found a secluded campsite under the cover of darkness. We pulled into a car camping spot and set up a tent on soft sand, within earshot of a gurgling stream.
The next morning, we broke camp and headed down the road toward Bartlett Lake.

We were outfitted with our SUP gear, and hit the water!
 A few hours gave us enough time to tour the perimeter, beach up opposite the marina, and have a little fun in the wake of a few motor boats. We took turns using our GoPro to capture photos and video hands-free.
 A quick Wikipedia search revealed that Bartlett Lake is technically a reservoir, which was created by damming the Verde River in the late 1930s. It's neighbor to the north is the Horseshoe Reservoir, also on Tonto National Forest land.
For those new to SUP, we decided to demonstrate the surprisingly stable nature of these boards:
We were pleasantly surprised by how empty the lake and marina were, despite it being Memorial Day weekend! Our theory is that most folks head to more well-known spots like Lake Pleasant. Bartlett Lake boasts that it is "Arizona's Best Kept Secret," and we'll have to agree!


Despite some difficulty navigating the roads of Tonto National Forest, we found a secluded campsite under the cover of darkness. We pulled into a car camping spot and set up a tent on soft sand, within earshot of a gurgling stream.
The next morning, we broke camp and headed down the road toward Bartlett Lake.
We were outfitted with our SUP gear, and hit the water!
For those new to SUP, we decided to demonstrate the surprisingly stable nature of these boards:
We were pleasantly surprised by how empty the lake and marina were, despite it being Memorial Day weekend! Our theory is that most folks head to more well-known spots like Lake Pleasant. Bartlett Lake boasts that it is "Arizona's Best Kept Secret," and we'll have to agree!
Friday, July 25, 2014
Grand Canyon Revisited
You may recall a previous post about a scouting trip for a future potential field trip to the Grand Canyon. Our team of 4th grade teachers and an incredibly supportive principal were able to make it happen!

First, a recap by the numbers:
149 - 4th grade students and parents in attendance
6 - teachers/staff
3 - days spent at the Grand Canyon National Park (South Rim)
2 - charter buses
4 - A.M. wake-up call to watch the sunrise on our final day
The field trip was a great success, but there are always lessons to learn and ways to improve. There are many things we will try to repeat for next year's trip, and there are a few things we'd change and recommend to others considering this field trip.
Successes:
- NPS Travelin' Trunk Program: We reserved a box of materials about Human History of the Grand Canyon before our trip. This piqued students' excitement, and gave them prior knowledge to access once we arrived.
- Keeping a full schedule (and opting not to include a quiet/nap time) - Any unstructured or idle time almost always guarantees mischief!
- Visiting other areas of interest on our way, including Sunset Crater (as mentioned in a previous blog post) and...
- Watching sunrise on our final day - This was a controversial decision, mostly because the sun rises so early in May. We decided to make it optional, and were overwhelmed when nearly our entire group helped each other wake up, walk silently, and snuggle together to watch a glorious sunrise!
- Reserving Ranger programs - The specific educational Ranger programs for school groups are FREE and align with state content standards. The Rangers are excellent teachers, too!
- We used colored handkerchiefs to identify each chaperone group. This was helpful for quick head-counts for both teachers and chaperones. Students could tie them anywhere that was visible, which also gave them a chance to express themselves in a fun way.
- Preparing student journals for the trip - We created activities/questions that had to be answered about our route and stops along the way. We also included the packet that was provided to accompany the Ranger programs.
- Scavenger Hunt - There is so much to see at the Grand Canyon, and it is nearly impossible to see it all in one short trip. We included all the various historical and educational sites along the South Rim (with questions and info from the NPS website) in student journals. Groups could then decide which locations were most interesting (and feasible). Some groups even got to every stop! Afterwards, students from different groups could discuss what they saw and learned with others.
- Chaperone committees - We couldn't have made the trip happen without lots of parent support. We had parents serve on committees for equipment, food, and safety to assist before, during, and after the trip.
- Talk with campers about quiet hours before arriving - It's important to keep our camp neighbors and Rangers happy when we are such a large and noticeable group.
- Call ahead to discuss any plans to use the free shuttle buses. The park personnel were incredibly accommodating as soon as they saw 150+ visitors crossing the street to catch a bus for sunset. They ran at least one extra bus every day we were there just for us! I'm sure they'd appreciate a little more advance notice next time.
Thursday, July 17, 2014
Around Town: Camelback Mountain
To continue our meandering closer to home, I set out to hike the popular Camelback Mountain. A year and a half ago, we set out to hike the less intense Cholla Trail with family, but ran out of time and and had to turn back before reaching the summit. This time, I would be hiking the more intense (and more crowded) Echo Canyon Trail.
ClimbCamelback.com describes Echo Canyon pretty succinctly:
This trail is an intense and difficult anaerobic hike the entire 1.2 miles to the summit. It ascends 1,280 ft, from 1,424 ft above sea level to 2,704 ft.
It was a warm spring day, and many folks were eager to take advantage of it. If you're looking to drive to the trail head, I suggest arriving early. Otherwise, be prepared to do some circles around the small parking lot, as it is usually full by mid-morning. Easier parking can be found on the Cholla Trail entrance.
This is definitely not a secluded or quiet hike, but it has beautiful views of the valley the whole way. The Echo Canyon Trail was recently renovated, and re-opened earlier this year. This video shows a few of the changes, and highlights a few of the views:
A few of my photos from the hike:
 |
| Saguaros were already in bloom! |
 |
| Ridge views looking east on the steep trail up |
 |
| Looking north from a false summit |
 |
| Red sandstone of the desert valley |
 |
| Panoramic views from the summit (1 of 4) |
 |
| 2 of 4 |
 |
| 3 of 4 |
 |
| 4 of 4 |
 |
| On the way down, we found a few critters who agreed to pose for a photo shoot. |
Subscribe to:
Posts (Atom)